Bringing the Ocean Indoors: A Practical Guide to Dolphin Laser Cut Home Decor
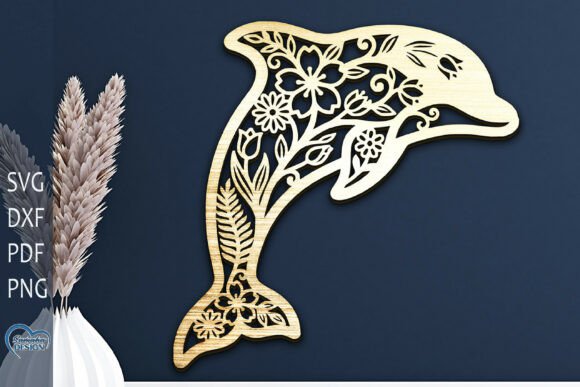
There is something universally calming about the silhouette of a dolphin leaping through waves. Whether you are a hobbyist looking to personalize your living space or a small business owner aiming to expand your product line, Dolphin Laser Cut Home Decor offers a versatile canvas for creativity. These designs bridge the gap between digital artistry and tangible beauty, allowing you to transform flat sheets of material into intricate wall art, hanging mobiles, or functional organizers. However, the journey from downloading a file to holding a finished piece is often where things can go wrong if you aren't paying attention to the details.
The appeal of Wall art Laser Cut lies in its precision. Unlike hand-carving, laser cutting allows for complex curves and delicate connections that would be nearly impossible to achieve manually. A well-executed dolphin design can capture the fluid motion of the animal with stunning accuracy. Yet, many creators rush into production without fully understanding the nuances of their chosen Home Decor Lazer Cut File. This oversight often leads to wasted materials, frustrated hours at the machine, and final products that lack structural integrity.
Choosing the Right Material for Your Vision
One of the most common misunderstandings beginners face is assuming that any file works equally well on every material. The recommended materials for these projects typically include Plywood, MDF, Acrylic, Plexiglas, Metal, Cardboard, and Paper. While it is tempting to grab whatever is closest, each material behaves differently under the laser.
For instance, if you are working with MDF or Plywood, you need to account for burn marks and the thickness of the kerf (the width of the cut). A design that looks perfect on screen might result in charred edges if your power settings are too high, ruining the clean lines essential for a professional look. Conversely, when using Acrylic or Plexiglas, the goal is a polished, flame-polished edge. If your focus is off or your speed is too slow, the acrylic can melt unevenly, creating a cloudy finish rather than a crisp one.
Metal requires a completely different approach, often needing fiber lasers rather than CO2 lasers, and usually involves engraving or marking rather than cutting through thick sheets unless you have industrial-grade equipment. For those just starting out or testing a design, Cardboard and Paper are excellent, low-risk options. They allow you to verify the fit of interlocking parts and the clarity of fine details before committing to expensive sheets of wood or acrylic.
The Trap of Resizing: Why Smaller Isn't Always Better
A critical aspect of working with a Dolphin SVG or similar vector file is understanding how scaling affects the physical outcome. You can generally increase the size of a design without significant issues; making a dolphin wall art piece larger simply means longer cut times and potentially needing to join multiple sheets of material if it exceeds your machine's bed size.
However, reducing the design is where disaster often strikes. When you shrink a Home Decor Lazer Cut File, every element within it shrinks proportionally. This includes the thin bridges that connect the dolphin's tail to its body or the delicate splashes of water surrounding it. If you scale the design down too much, these "thin elements" may become thinner than the laser beam itself or too fragile to survive the cutting process without breaking apart.
To avoid this, always inspect your design at 100% scale before sending it to the cutter. Look for lines that appear hair-thin. A good rule of thumb is to ensure that no structural bridge is narrower than the thickness of the material you are cutting. If you must reduce the size, consider simplifying the design by removing the finest details or thickening specific vectors in your editing software. This proactive step saves you from pulling a pile of broken confetti out of your laser bed.
Navigating File Formats for Maximum Compatibility
When you purchase or download a comprehensive package, you will likely receive a ZIP archive containing files in various formats: SVG, PNG, DXF, PDF, and EPS. Knowing which file to use for your specific workflow is vital for efficiency.
- SVG and DXF: These are your primary workhorses for cutting. They contain vector paths that tell the laser exactly where to move. Use these for actual production.
- PDF and EPS: Great for editing in programs like Adobe Illustrator or CorelDRAW if you need to make adjustments before exporting to a machine-specific format.
- PNG: This is a raster image, useful for previews, marketing materials, or engraving depth maps, but generally not suitable for precise cutting unless traced first.
A frequent mistake is attempting to cut directly from a PNG file. Since PNGs are made of pixels, the laser software may interpret the edges as jagged steps rather than smooth curves, resulting in a rough, unprofessional cut. Always ensure you are importing the vector versions (SVG or DXF) for the cutting phase to maintain the smooth, organic curves of the dolphin shape.
Quality Control Before You Cut
Before you commit your material, take a moment to evaluate the file itself. Even high-quality designs can have quirks depending on the software you use to open them. Check for "open paths" where a line doesn't quite connect, which can cause the laser to make unnecessary travel moves or fail to cut a section entirely. Also, verify that there are no duplicate lines stacked on top of each other; this common error causes the laser to trace the same path twice, leading to excessive burning and widened gaps.
If you are planning to sell your creations, consistency is key. Ensure that your settings are documented so that every Dolphin Laser Cut Home Decor piece you produce matches the last. This builds trust with your customers and establishes your reputation for quality.
Finally, remember that support is available. If you encounter issues with a file—perhaps a layer is missing or the scaling seems off—do not hesitate to reach out. Most creators of these digital assets are happy to help troubleshoot. A simple message asking for clarification can save you hours of frustration. Whether you are a freelancer, an educator teaching design principles, or a homeowner adding a touch of the sea to your walls, taking the time to understand your tools and materials will ensure your project leaps off the page and into reality successfully.